How to Use An Avent Bottle Warmer?
 Photographed for Urban Mamas · January 8, 2026
Introduction
Suppose you're searching for a bottle warmer that matches your bottles and baby food cans. If you really don't mind a bottle warmer that doesn't have to be washed and doesn't require a calculation of temperature, then the Avent bottle warmer is what you need.The Avent bottle heater is available on the market and is known for its elegant style, fast heating and versatile heating chamber, not ignoring its technical features. The Avent bottle heater heats up using the 'Bain Marie' steam bath method, which mimics the positioning of bottles in a pan, but is actually electrically operated.
Design and Build of an Avent Bottle Warmer
All Avent bottle warmers are designed by the coordination line of Avent bottles, toddler cups, and baby food jars for a full collection of food warmers, you would be ready to go with that set! No extra parts are missing, such as measuring cups or lift-out baskets.Avent bottle warmers have a variety of set ups, which includes unfreezing.
In only three minutes the Avent baby bottle warmer warms up to 4 ounces of milk in a 5-ounce bottle, so it's friendly and quick for busy schedules and late-night feeding.
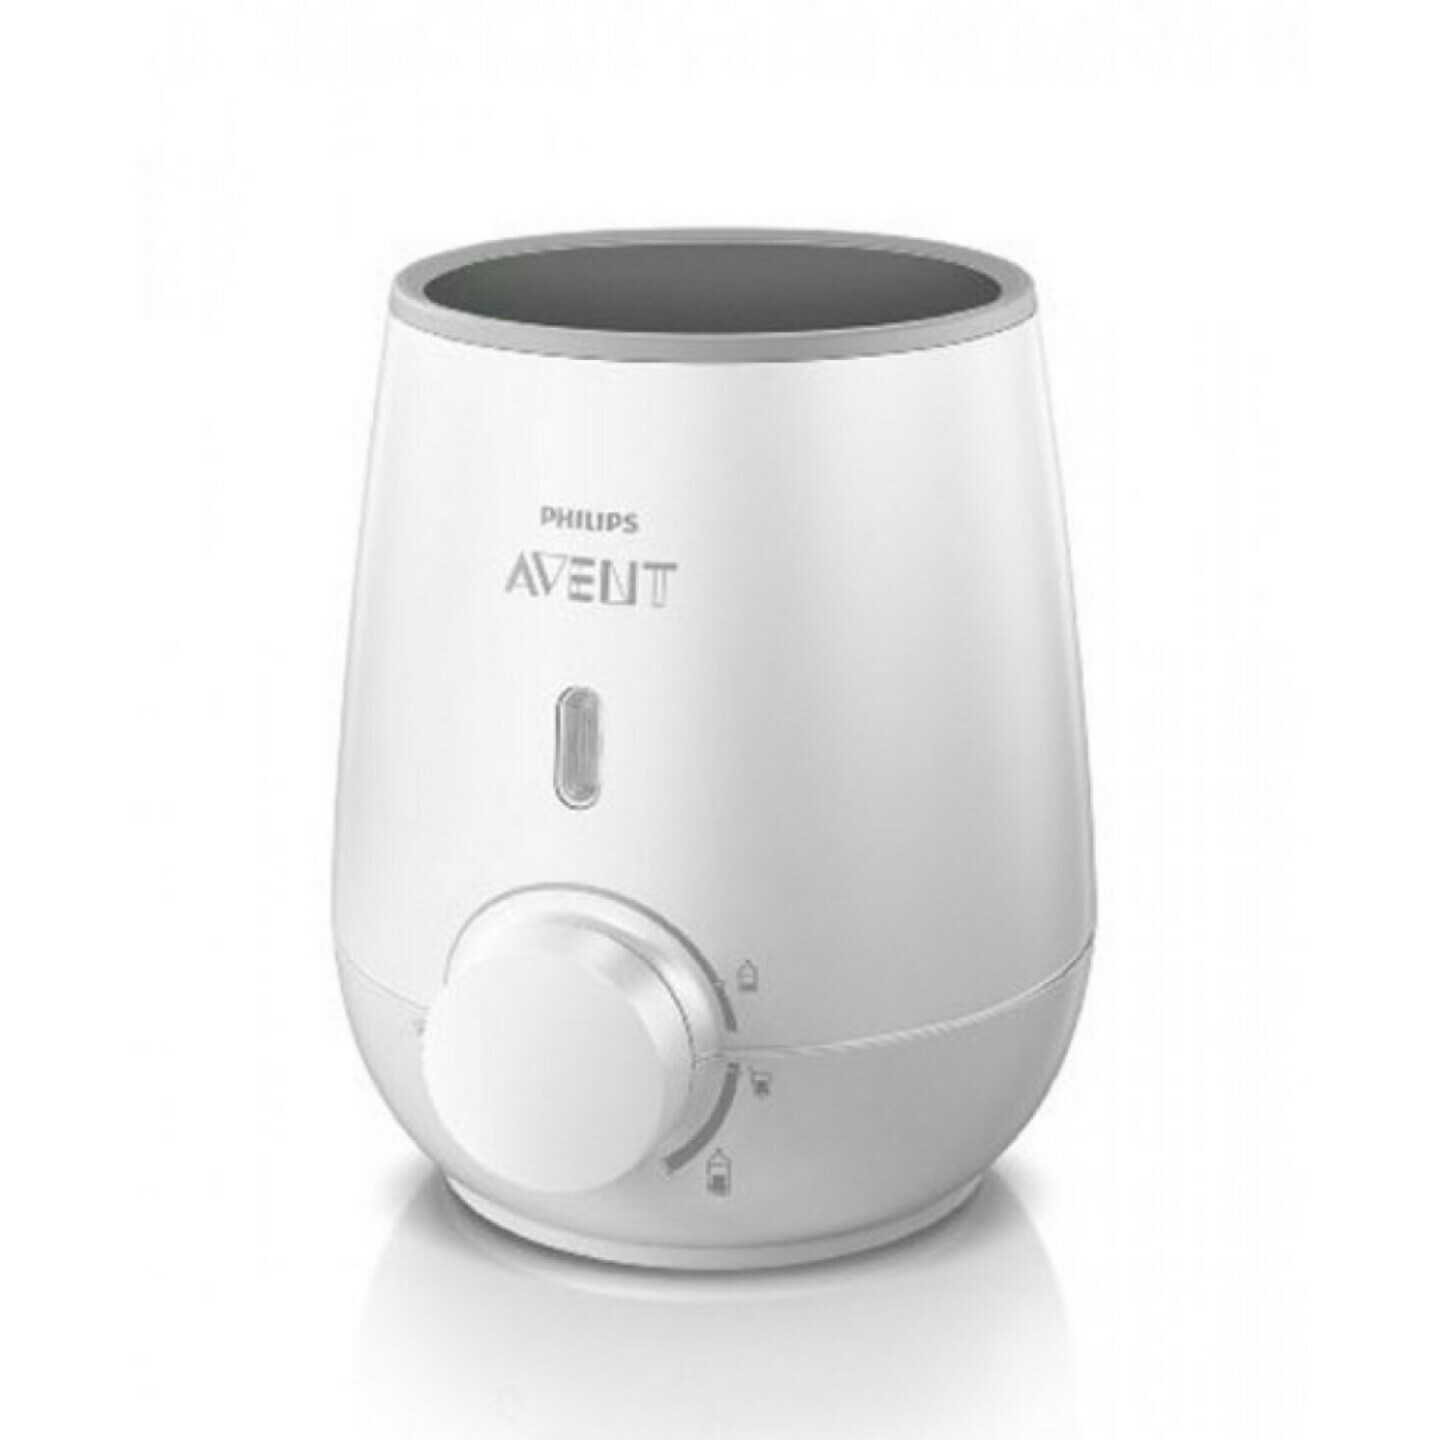
A warm-up unit with a warm-up chamber, an indicator light, and a dial. Avent bottle warmers also have an on / off switch on the back. Avent bottle warmers do not come with a different measuring cup. You'll probably need to use an Avent bottle warmer with a standard kitchen timer.
Steps To Use an Avent Bottle Warmer
- Step One: Practice Safety Precautions: Before using the Avent bottle warmer, ensure the bottle warmer is cool. It gets scorching when it’s in use, so keep your safety in proper check. You may need to use protective gloves when handling the device. It's an electrical device, and little children shouldn't use it. If milk leakage or spillage or should occur, switch off the machine and have it removed from the power source instantly.
You should allow it to get cool and then clean up.
- Step Two: Place the bottle in the Warmer: Put the bottle into the warmer with the Avent bottle turned off. Be sure to put enough water to cover 0.5 inches well above the formula level inside the bottle. Most manufacturers would recommend that to avoid scaling. You must adjust the water every time.
- Step Three: Set Your Dial: Connect the bottle warmer if it has not been plugged in.
Then press the button at the rear of the warmer to turn it on. Turn the knob to the size of the bottle you've got. There are images of various settings in front of the Avent bottle warmer dial. For a standard five oz. Baby bottle, you would want to switch it into a bottle set. When you turn the dial on, the indicator light will come on to let you know it's functioning.
- Step Four: Make Use of a Kitchen Timer: The Avent bottle warmer doesn't come with a timer did not design on its own, nor does it make any noise when it's finished.
It doesn't shut down automatically. So, you're going to have a kitchen timer in position. Have the timer set to a 5 oz standard for three minutes. Most bottle heater comes with its guidance chart for how long you can set the timer. Warming periods are different. The bottle should be ready when the kitchen timer goes off.
- Step Five: Done Heating: when you are done heating the bottle, you should switch the dial counter-clockwise to turn off the machine.
Using a towel, an oven mitt, or some hand protective glove to take the bottle out of the bottle warmer. You should set it on a dry fabric piece since it has been in warm heating water for up to three minutes. Take up the bottle in your hand and whirl the milk around to see whether it's hot enough. Shake a few drops of milk on your wrist to ensure it's not too hot. Then you can feed the baby when it's fully ready.
- Step Six: Maintenance: You should properly care for your Avent bottle warmer by using it correctly and keeping it clean.
Before you start with the cleaning, ensure the device has cooled off. First, you have to unplug it and not let water get into it while it’s hot. Pour two ounces of white vinegar into the warmer, then pour 4 ounces of cold water into the warmer. Allow for some time for the limescale to dissolve. The dissolution process takes about 8 – 10 minutes. After that, you should empty the warmer and thoroughly rinse it.
So it is recommended that you de-scale your warmer every 10 – 14 days. However, this depends on the lime build-up.
Reasons to Use the Avent Bottle Warmer
- Constant Temperature: one of the most important benefits of using an Avent bottle warmer is that they typically can retain the milk's temperature inside the bottle.
- Time Efficient: When using a microwave or stove to steam the milk, efforts are required to check the temperature of the liquid again and again, and this is time-consuming.
With the aid of the bottle warmer, the temperature is set to a certain degree, and you don't have to check it endlessly.
- Consistency: Using the microwave to warm your milk does not guarantee that the milk will be warmed up on all sides. However, the Avent bottle warmer tends to warm and heat the milk from all sides.
- Convenience and Variety: Ensure to keep an Avent bottle warmer whenever you are traveling with your baby.
There are different models you can select from, some of these warmers are relatively easy to carry and you can charger them using your car plug.
Conclusion
Using an Avent bottle warmer is a smart choice for new moms. They can serve several purposes and can be handy when it comes to preparing a quick feed for babies. Other than the advantages, they are also easy to use. Daddy can also use it because it's a hassle-free way to heat the milk.All you need to do is add water to the heater, configure it to the proper temperature, place the bottle inside the water, and once the bottle rings or the light is lit, it's an excellent way to go. Furthermore, when you carry your baby, on the other hand, you can also warm the baby bottle with one hand.